Video transcript:
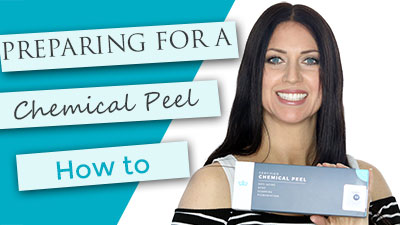
Today I am going to talk about getting your skin prepared for a chemical peel.
When preparing your skin for a peel, there are some steps that are mandatory and others that are just recommended, but with chemical peels preparation is DEFINITELY key if you want a great end result.
So, let’s get started!
Just like if you are going to paint your wall. You are first going to scrape off any blemishes in the wall.... then fill in any holes ... and then you are going to sand those areas, any other rough areas, and then go over the entire wall.
You are going to do every step you can so that your finish is even and smooth. NOW when you paint your wall it will look absolutely perfect.
Well the same thing goes for your skin. If you just applied a chemical peel to an uneven and rough unprepared surface, … well, what you are going to get is some areas that take up the peel well and others that don’t get enough acid penetration.
Sure, you will get some flaking – but not the end results you were intending and you may actually be disappointed.
So let’s talk about some ways that you can prepare your skin for a peel. I recommend prepping for at least 2 weeks if you can. And if you are already using professional skin care products – you are probably well on your way already! This isn’t hard or complicated.
On page 3 of your Peel Manual we list all these steps, so don’t worry if you aren’t taking notes. …
With the milder hydroxy acids such as Glycolic, Mandelic, Salicylic and Lactic, preparation can be minimal.
One of the simplest things that you can do is use an acid based cleanser. Acids help to thin the stratum corneum so your skin is more even and ready to accept any treatments – especially a peel.
Choose a cleanser based on your skin type.
AB for oily or acne skin. Antiaging Lactic for dry skin. Revitalizing for normal or combination skin. Wash 2x per day to smooth and prepare.
During the daytime, follow your acid cleanser with an antioxidant like our High Octane Vitamin C Serum to aid in not only brightening and evening the skin tone, but to aid in stimulating regeneration in the skin.
Don’t forget your SPF of at least 40 to protect your skin before heading out. *You will need this after as well.
Another simple way to prepare your skin is with an Acid Serum. You can choose from our Serum 15 or Serum 30. Both are perfect for exfoliating the dead skin build up and have a combination of glycolic, mandelic, phytic and vitamin c in a hydrating hyaluronic acid base. Apply this in the evenings before any other creams.
Another great thing about preparation products is that they will serve perfectly as your staple skin care when you aren’t peeling. The daily acid use will keep your skin looking smooth, clear and healthy in-between peels.
Now, if you are using one of the stronger peels such as TCA or a Jessners or have medium – dark skin coloring, or severe pigmentation issues, you will need to prepare your skin further.
With the stronger acids we recommend preparing the skin with Retinoids instead of hydroxy acids. If you are on a Tretinoin prescription that is fine. If not, then we suggest you begin using our .10% or preferably .20% Retinol Molecular Serum every evening.
This will help to thin the outermost layer of dead skin as well as pre-treat any pigmentation that you are dealing with – AND… an added bonus – it stimulates collagen production.
Now the biggest reason to use retinol prior to a peel is to help with healing. Vitamin A will put your skin into a hyper-regenerative state. This means that pimples heal faster, pigmentation is reduced more quickly – and of course your skin will heal faster after a peel.
The other product that is mandatory if you have dark skin and highly recommended if you have pigmentation issues, is a melanin inhibitor.
Our Fade Bright can be applied 2x per day to help slow the melanin production in the skin – as well as begin the lightening process on your pigmentation.
We recommend using this for a minimum of 2 weeks – and preferably longer if your skin is very dark. Most people are in a hurry to start the peeling process, but if you aren’t, then up to 6 weeks would be ideal.
Apply Fade Bright as a first layer to freshly cleansed skin. You can follow it with your Vitamin C and any other serums or creams you wish during the day – don’t forget your SPF!
If it’s night time, apply your Fade Bright and then your Retinol.
Now a few helpful Precautions.
- If you have never used an acid before, apply a patch test to check for allergies.
- Wash an area on the neck (around the ear area is a good spot), use alcohol and then apply a dab of the solution. Let it sit for 5 minutes and rinse well. Now watch that area for extreme irritation or any other issues for the next 24 hours. If nothing happens you are good to go.
- If you are prone to getting sores from the herpes virus, get started on your prescription medicine prior to performing a peel. Acid can cause a breakout to happen if you aren’t prepared ahead of time.
- If you are sensitive, stop using your retinol or acid serum 2-3 days prior to your peel.
- If you aren’t sensitive, you can use the product the night before without issue.
- Stop using any abrasive scrubs or cleansers with beads a day or two before your peel and NEVER exfoliate immediately prior to a chemical peel. The reasoning behind this is that when you manually exfoliate your skin it is uneven. You will scrub harder on certain areas and the skin won’t be even. That is exactly why we use either the Acid Serum or Retinoids to even the skin instead.
- Wait at least 24 hours to perform a peel if you have waxed or shaved that area. If there are open areas or bleeding – then prolong your wait until the skin is healed.
- Tip on application – if you have any areas you wish to AVOID getting the peel solution on, just use some petroleum jelly to form a barrier. Apply that with a A-tip. Common areas are the lips, or corner of the nose. Also, on the lash line if you are applying to the eye area.
Well that wraps everything up for today. As always, if you still have more questions – just reach out to us. We are here to help!


